Here's the "before" pic. The Cowgirl wants to use those old scaffolds as a make shift arbor to walk under when you open the gate and put a climbing vine on it. Should look good. For now I just connected the two scaffolds with 4 pieces of 2x4. I drilled a few holes that fit onto the pegs where the X braces would have gone.

Here's the gate that I'm going to install. I thought about getting a wood one, but that would block the sunlight on plants that are going to be behind the gate. It's your basic Lowe's special. It was like $30, plus you have to buy all the hardware a-la carte.

Here's all the stuff to do the job. I got the hinges that go into wood, and two brackets, and the latch. Obviously the drill and the tape measure are needed.

Mistake #1 - I can never seem to get through an entire project without messing up a few times. I put a regular drill bit into my drill, and I was rocking it around to enlarge the hole, and the drill bit broke off inside the hole... oopse!

So I got out the 1/2 inch paddle bit that I should have used in the first place, and drilled a second hole cause I couldn't get the old broken bit out.

So there you go. Now if you're ever over, you can point at the extra hole, and laugh at me.

Here's a cool trick of the trade that I picked up somewhere. Get a big adjustable wrench or box wrench, or a piece of pipe will work good too. Get the screw bracket started by hand till it bites, then use the leverage of the wrench as a handle to turn it. Works great, and it's a million times easier than trying to turn that bracket after it's in an inch or two.

Here's both hinge brackets installed. When I did my first gate, I though that both pins should be facing up and you would just drop the gate on there. But the reverse is also true, someone could walk up and just take the gate off.
So the correct way is to have them facing each other. Put the bottom bracket on first, then tighten the top one to the hinge, not the other way around.

MISTAKE #2: I bought the square head bolts that were right next to the gate hardware, and they are not long enough to go through the hinge.

My first fix attempt was to bend the metal bracket with a C-Clamp until it was close enough to get the bolt through. Didn't work.

I dug through the old pile of spare hardware and happened to have a few longer bolts and nuts. Score! No extra trips back to the hardware store.

SUCCESS IS MINE!

Just put them on the hinge, and tighten it down. That part is done.

Now I put the latch on. But I knew that the latch would not fit on the wood 4x4. I saw a trick that a framer did one time on a tv show, so I thought I'd try it out.

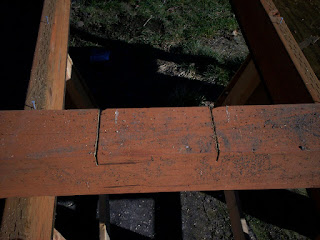
Set your skill saw to 3/4 of an inch and make two cuts to mark the top and bottom of the material you want to take out.

Now just make cuts every half inch or so. Also I found the height of where this needed to be cut by first digging the hole and then marking it with the latch.

Next take a chisel or a screwdriver and the wood will pop right out. If your wood is nice and dry that help out. Sometimes the 4x4's are really wet. This technique doesn't work as well with the wet wood.

Nothing to it...

Clean it up a bit with the chisel. I did both sides 3/4 of an inch.

Here's a shot of the post hole. I just used some 3/8" minus and tamp it down with a tamp bar.

Some people call them pry bars... but this one has the tamper on the other end.

I use the Porter Cable nail gun with 1" galvanized staples in it to attach the fence to the posts...

And there you go... Done deal.
See you on the farm.
~ron
If you like my blog, please click on an Ad that interests you. Thanks.
